


.jpg)


Today's feature at Practical Scrappers is using punches on cards: shape, border, corner, any kind! I wanted to use my punches in a way I hadn't used them before, and I started looking online. I found this fantastic tutorial at the Just Imagine Crafts blog on how to use a circle stencil combined with a corner punch to get a great looking punched circle, but I don't have a circle stencil, so I decided to try the technique without it. I had no choice of corner punches either as I have only one (they are so heavy to mail...) so this one had to do.
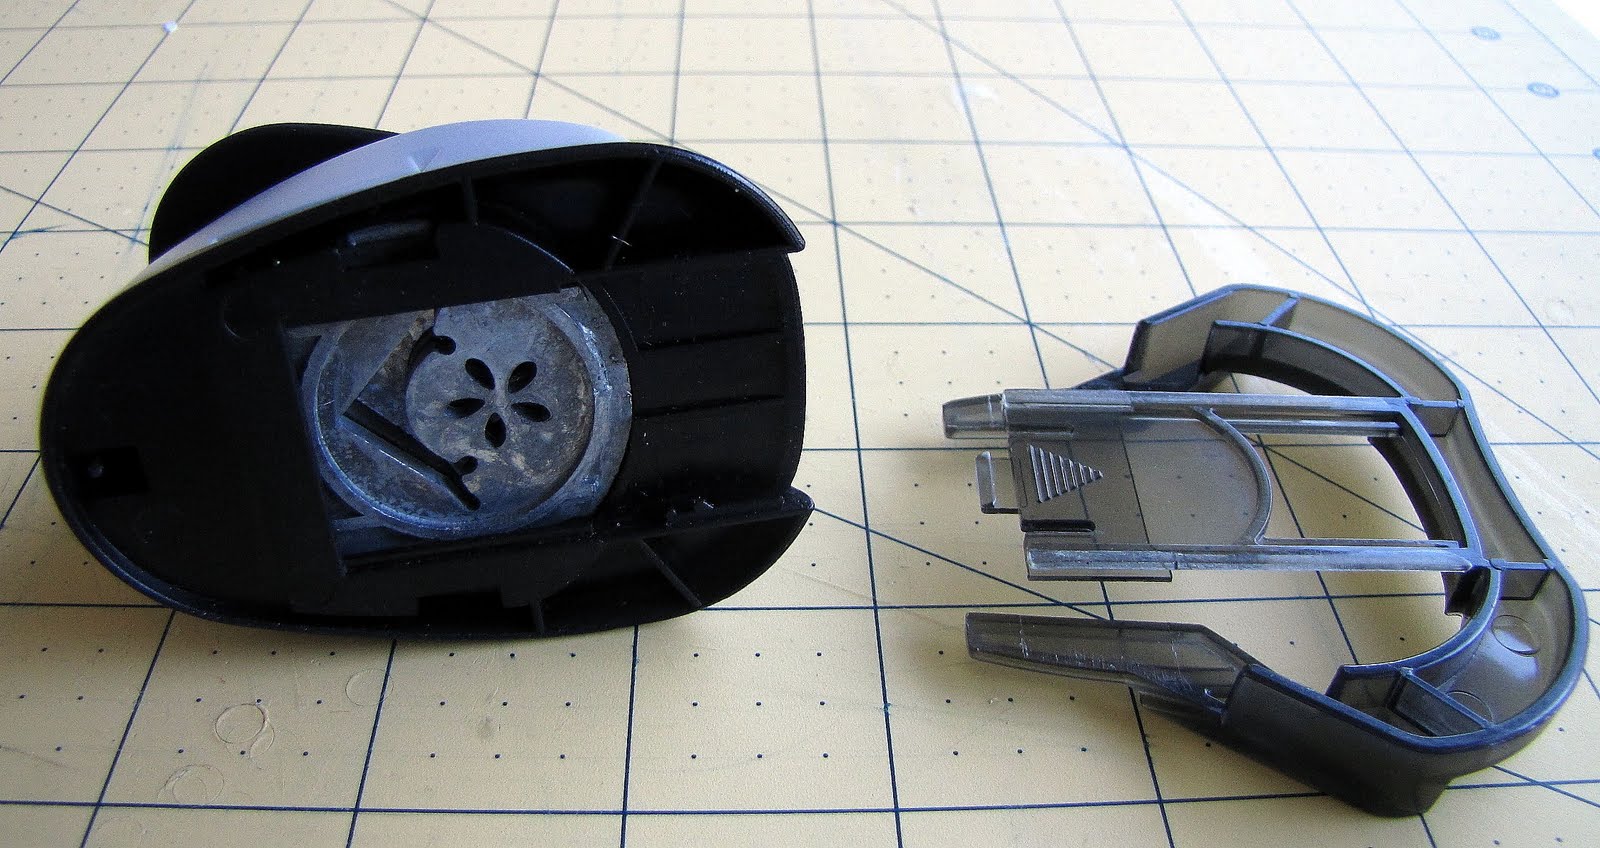
First of all, I detached the bottom plastic part of the punch.
Then, I cut a circle (almost 3 inches in diameter) on the front of the card. I tried with several circle sizes on paper first, and it seemed to work with every size, but maybe I was just lucky, so you'd better try the circle size you choose on some scrap of paper first.

The next step was to place my punch as far as it would go into the circle, and punch.

For the next punch, you need to make sure the shapes overlap the tiniest bit. Can you see the white square in the pic below? That's where they overlap.

Here it is almost finished:

And here is the finished card. It has an envelope to hold money and a tag to write a message on.

When you look inside, it looks like this:

I don't like the look of the brown and blue lines, too informal for the look of the card, but once I'd drawn them there was nothing I could do about them!!!!
Finally, here's a close-up of the inside of the card:

And now I am off to my online scrapbooking store to get some corner punches... I wonder how I've survived for so long with only one!!!!!!!!!!!
List of supplies:
Patterned Paper: SEI
Chipboard shapes: SEI
Pressed linen accents: SEI
Sentiment Sticker: My Mind's Eye
Metal embellishments: BSue Boutiques
Pearls: Mark Richards
Glue: Glue Glider Pro


